
How to set a default site in your admin portal
If you manage multiple sites in your admin portal, switching between them each time you log in can be a hassle.
With the Default Site feature, you can set your most-used site as your starting point, saving you time and making your workflow smoother. In this article, we’ll walk you through how to set your default site and explain how this feature helps you stay focused on what matters most.
How to Set Your Default Site
It’s quick and easy to set up your default site. Here’s how you can do it:
Log in to your admin portal.
Click on your site and select Manage Sites.
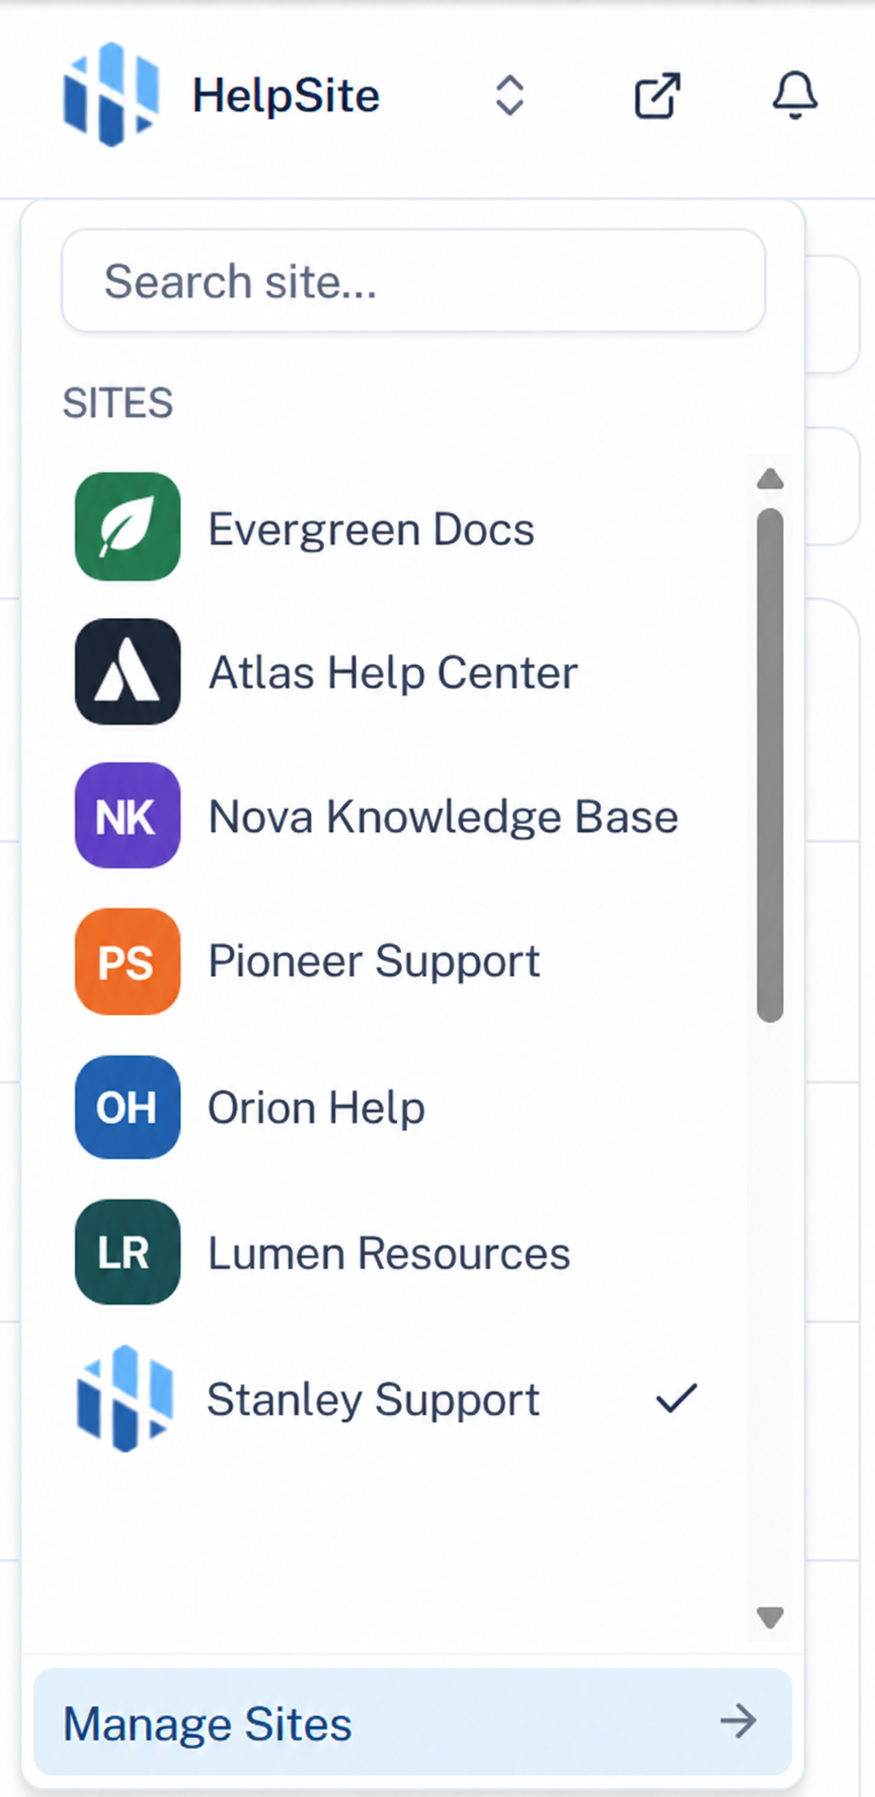
Select your default site.
On the Manage Site page, you’ll see a list of all your sites. Find the site you want to set as your default and toggle the Set as Default option. Your selection is saved automatically.
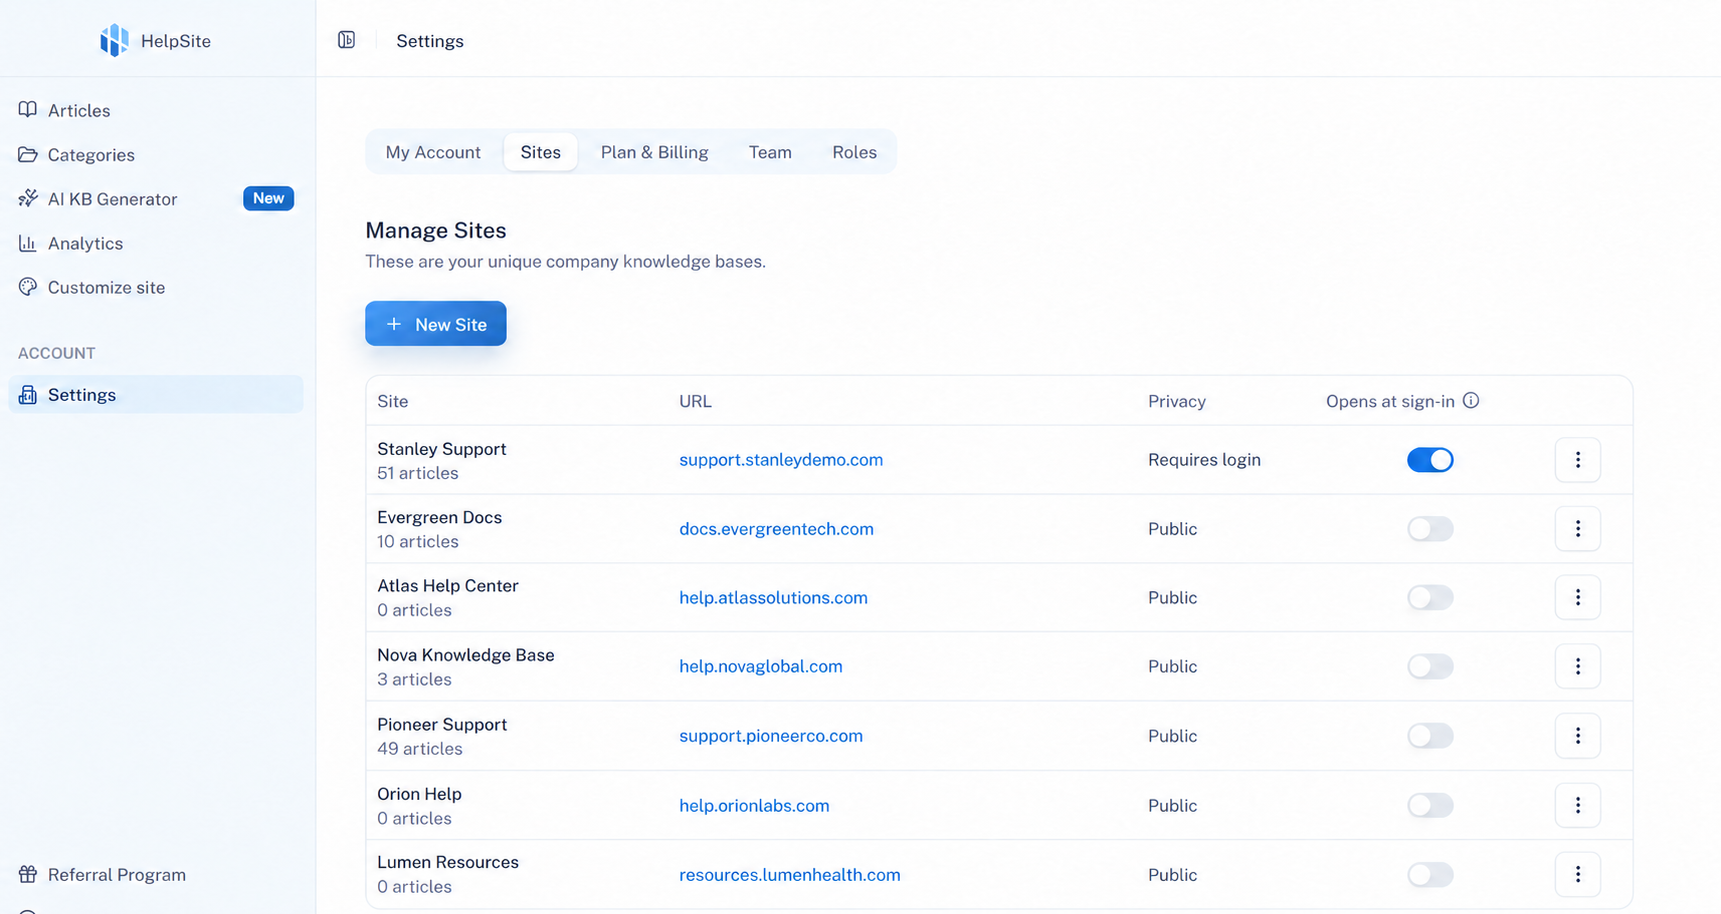
How the Default Site Feature Works
Once you set your default site, every time you log in to your admin portal, you’ll be taken directly to that site. If you ever need to work on another site, you can still switch between your sites from the site list—your default just makes the process more convenient.
You can change your default site at any time by repeating the steps above and selecting a different site.