
Using the WYSIWYG Editor
The WYSIWYG (What You See Is What You Get) editor in HelpSite makes it easy to create and edit articles without needing to write code. It includes all the tools you need to format text, add media, and keep your content clear and professional.
Key Features
→ Text formatting – bold, italic, strikethrough, subscript, superscript, text color, highlight, clear formatting
→ Headings – choose from different heading levels (H1–Normal)
→ Paragraph alignment – left, center, right, justify
→ Blockquote – emphasize quotes or callouts
→ Lists – numbered lists, bullet lists, checklists
→ Code blocks – insert formatted code snippets
→ Links – add hyperlinks to other articles or external sites
→ Media – insert images, videos, and attachments (Any file type up to 25MB)
→ Tables – create and edit tables with full controls
→ Dividers – separate sections of content visually
→ Undo/redo – easily correct mistakes with history controls
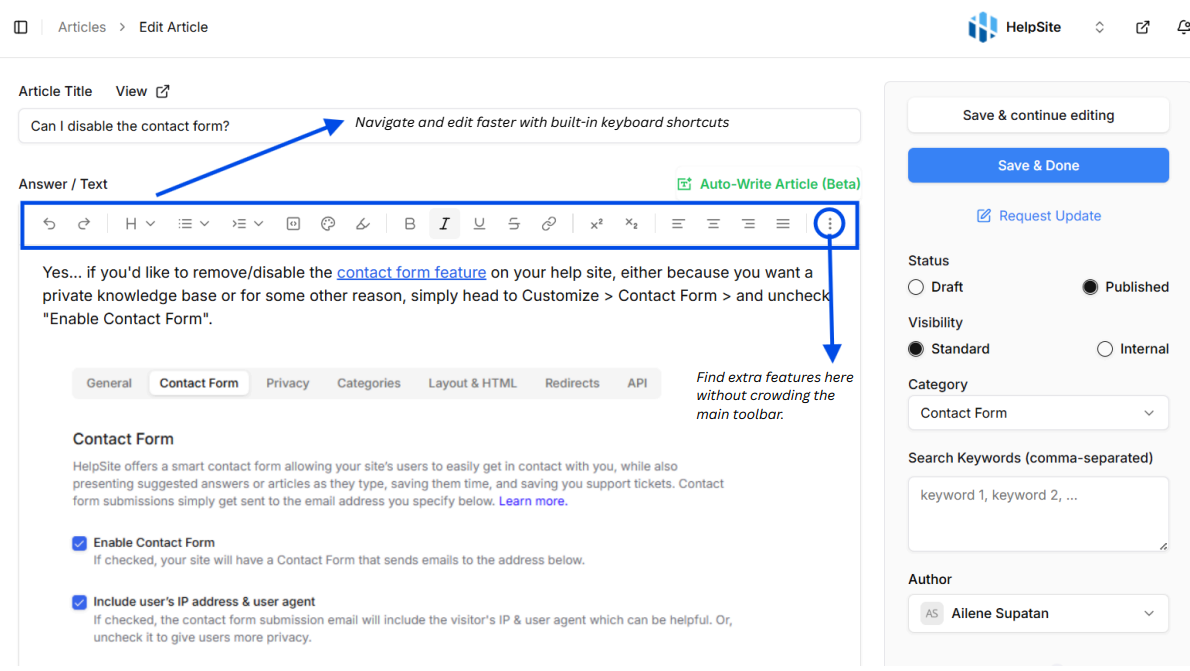
Tip: Click the 3-Dot Overflow Menu – Access additional features quickly without cluttering the main toolbar.
Accessibility & Responsiveness
Works across all modern browsers (Chrome, Safari, Firefox, Edge).
Fully usable on desktop and mobile devices.
Toolbar adapts automatically to different screen sizes.
Supports keyboard navigation and screen readers.
Best Practices
Use headings to organize your article structure.
Add images, videos, or tables to make content more engaging.
Keep formatting consistent for a professional look.
Use checklists for step-by-step instructions.
Always preview your article before publishing.
Troubleshooting
If formatting doesn’t look right, try clearing formatting and reapplying styles.
If images or videos don’t display, check that the file format and size are supported.
Use undo/redo to recover from mistakes without starting over
With the WYSIWYG editor, everything you create looks the same while editing as it does when published, making it simple and reliable for building your knowledge base.